

Most cyclists don’t consciously “select” a training system… it just happens…
They jump on their bike every day then based on how they feel they “decide” just what training they should do. This could be a 60min time trial, or a group ride with their mates… usually letting the senior riders dictate the days workout… sound familiar?
For the record… this is NOT the way to achieve your true potential as a bike racer.
In truth, there are three different training systems, namely “racing into shape”, the “always fit” method and “periodization".
Periodization can be broken down still further however for the purpose of this article we will stick to the "classic" periodization model.
The “Race into shape” method:
This is the most common training system used by cyclists as it’s easy to do…
Step 1 involves building a large aerobic base by pedaling around 1500km – 2000km at an easy pace. While this amount of “easy” riding works, in truth for some it’s simply too much while for others it’s just not enough…
Step 2 involves racing every weekend and getting in a mid-week race (if available) or a hard group ride. The result will be a higher level of fitness…
There are some good reasons to use this method of training, the most important being that the fitness gained is specific to the demands of racing.
Training this way however is unpredictable as there is no planned rest and as a result overtraining can occur.
The “Always fit” method:
In warm climates cyclists often try to stay in race-shape through the year. The cooler weather and frequent races through-out winter entice them to keep a constant level of fitness by doing the same training riding week in and week out.
The greatest issue facing this type of athlete is boredom and burnout. Burnout is not a pretty sight. All interest in training, racing and life in general goes for a “ball”…
Another problem has to do with physiology as after about 12 weeks of training the same way, improvements seem to plateau… since fitness is never static, if you are not improving you must be getting worse!!!
The “Periodization” method:
This is the system used by most successful athletes today.
The basic principal of all periodization programs is that training should progress from general to specific.
Yes, periodization means more than simply training more specifically. It also involves arranging your workouts in such a way that the elements of fitness achieved earlier in your training are maintained while new ones are addressed and improved. This modular approach to training means making small adjustments in your workouts every 4-8 weeks.
Flexibility of training or the lack of it may be the biggest obstacle facing a cyclist using periodization as successful periodization requires flexibility.
The language of periodization seems to confuse many; however the following are the terms that I like to use as these are the terms made popular by the likes of Joe Friel, Hunter Allen and Dr Andy Coggan amongst others…
The terms are as follows: Preparation Phase, Base Phase, Build Phase, Peak Phase, Race Phase and finally the Transition Phase.
Training Phases:
Trying to improve all aspects of training at once is simply not possible hence the need to break your training down into manageable “phases” as indicated above.
The elements common to most periodization plans are increased volume at the start of the training season followed by increased intensity as the volume decreases.
Preparation Phase:
This phase generally marks the start of your training year and is included only if there has been a long transition following the end of your previous Race Phase.
The purpose here is to prepare your body for the next phase of your training plan. Workouts are low intensity with an emphasis on aerobic endurance, especially in the form of cross-training.
The total volume of training is low when compared with most other training phases.
Speed skills can be developed through drills, usually done on an indoor training or a set of rollers.
Base Phase:
The Base phase is your time to establish your basic fitness abilities of endurance, force, and speed skills. Generally, this is also the longest phase of your season and should last around eight to twelve weeks.
The base phase is divided into three segments: Base 1, Base 2 and Base 3.
Base 1 marks the start of steady increases in volume to boost your aerobic endurance and increase your body’s resilience to handle larger training loads.
In Base 2, on-bike endurance work begins to replace cross-training as the training volume increases. As your road rides become longer, the companionship of a group helps to pass the time. Just make sure that you ride with a group that rides at YOUR required pace and does not turn every ride into a “race”.
The majority of your road rides should be on continuously rolling to hilly routes that place controlled stress on your neuromuscular system. The best routes at this time of the season keep your efforts below threshold and allow cadences of around 80rpm and higher while seated on a hill.
Muscular-endurance training is also introduced in Base 2, with the addition of Tempo workouts based on hear rate or power output.
Base 3 marks a phasing-in of higher intensity training with the introduction of some proper hill work done at or slightly above threshold. Base 3 also brings about your highest total weekly volume of training with aerobic rides accounting for more than half of your training time. By the way, your longest training rides should now be as long as your longest race of the season, or two hours… whichever is the longer…
Group rides are still the best way to get the miles in but while it’s ok to occasionally put the hammer down in a sprint, just make sure you don’t turn these rides into “races”!!!
Your purpose now is to get as fast as you can with low-effort rides before turning up the heat in you Build phase.
By now, several weekly workouts should now have you riding at threshold, while your Speed-skills work is done mostly as “Form Sprints” on the road.
Build Phase:
Anaerobic-endurance is now introduced in your Build phase and just with force, hill work, and muscular-endurance training, this should be done with caution to avoid injury.
Feel free to race during this phase of your training, but remember that these are low priority races and you should regard them as a substitute for some of your anaerobic-endurance workouts. Anaerobic-endurance workouts may also include intervals and fast group rides.
During Build 1, endurance work is reduced but is still a prominent focus of your training. You would be better off by doing your long easy endurance rides at this stage with one or two team mates or training partners rather than a large group. Use the group rides for the development of muscular-endurance and anaerobic-endurance.
In Build 2 you again slightly decrease the volume of your training while increasing the intensity. Training in Build 2 emphasizes intensity to a greater extent than in the previous four weeks. Anaerobic-endurance and muscular-endurance sessions become longer while recovery is decreased between your efforts.
Peak Phase:
Now is the time you consolidate your racing fitness. It’s time to reduce your volume and keep intensity levels high relative to your expected demands of your targeted races while emphasizing recovery between workouts. Ideally you would want to train at race-pace intensity every 72-96hrs.
These workouts may also include “B” or “C” priority races that serve as a tune-up for the “A” races that follow.
The purpose of periodization is to reach peak form just as the important races occur.
Race Phase:
Whoop, Whoop… this is the FUN TIME!!!! Now all that is needed is to race, work on your strengths and recover…
In weeks where there are no races, a race-effort group ride is the best option.
Until now you have been working on your “limiting factors”, now it’s time to improve your strengths, so make them as strong as possible!!!
Transition Phase:
Your transition phase is a time for rest and recovery following your race phase. This should always be included after your last race for the season, but may also be inserted early on in your season following your first Peak phase to help prevent burnout later in the year.
Early season Transition phases may be brief periods of perhaps five to seven days, while at the end of your season such a break may be four weeks or so.
Use this time to “recharge your batteries” for your training and racing to come….
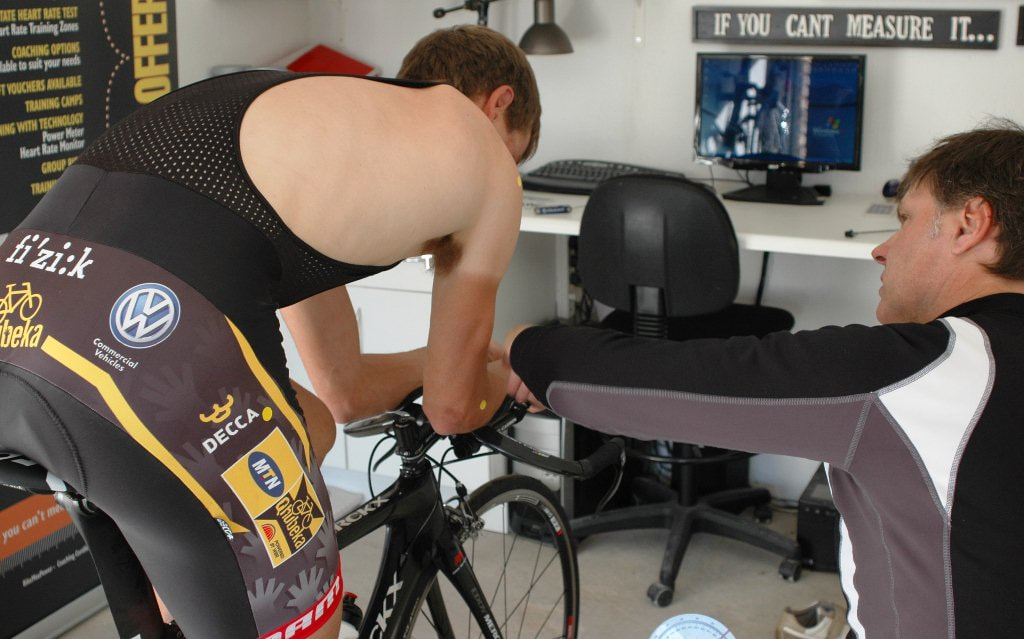
Remember, “If you can’t measure it, you can’t manage it!”
They jump on their bike every day then based on how they feel they “decide” just what training they should do. This could be a 60min time trial, or a group ride with their mates… usually letting the senior riders dictate the days workout… sound familiar?
For the record… this is NOT the way to achieve your true potential as a bike racer.
In truth, there are three different training systems, namely “racing into shape”, the “always fit” method and “periodization".
Periodization can be broken down still further however for the purpose of this article we will stick to the "classic" periodization model.
The “Race into shape” method:
This is the most common training system used by cyclists as it’s easy to do…
Step 1 involves building a large aerobic base by pedaling around 1500km – 2000km at an easy pace. While this amount of “easy” riding works, in truth for some it’s simply too much while for others it’s just not enough…
Step 2 involves racing every weekend and getting in a mid-week race (if available) or a hard group ride. The result will be a higher level of fitness…
There are some good reasons to use this method of training, the most important being that the fitness gained is specific to the demands of racing.
Training this way however is unpredictable as there is no planned rest and as a result overtraining can occur.
The “Always fit” method:
In warm climates cyclists often try to stay in race-shape through the year. The cooler weather and frequent races through-out winter entice them to keep a constant level of fitness by doing the same training riding week in and week out.
The greatest issue facing this type of athlete is boredom and burnout. Burnout is not a pretty sight. All interest in training, racing and life in general goes for a “ball”…
Another problem has to do with physiology as after about 12 weeks of training the same way, improvements seem to plateau… since fitness is never static, if you are not improving you must be getting worse!!!
The “Periodization” method:
This is the system used by most successful athletes today.
The basic principal of all periodization programs is that training should progress from general to specific.
Yes, periodization means more than simply training more specifically. It also involves arranging your workouts in such a way that the elements of fitness achieved earlier in your training are maintained while new ones are addressed and improved. This modular approach to training means making small adjustments in your workouts every 4-8 weeks.
Flexibility of training or the lack of it may be the biggest obstacle facing a cyclist using periodization as successful periodization requires flexibility.
The language of periodization seems to confuse many; however the following are the terms that I like to use as these are the terms made popular by the likes of Joe Friel, Hunter Allen and Dr Andy Coggan amongst others…
The terms are as follows: Preparation Phase, Base Phase, Build Phase, Peak Phase, Race Phase and finally the Transition Phase.
Training Phases:
Trying to improve all aspects of training at once is simply not possible hence the need to break your training down into manageable “phases” as indicated above.
The elements common to most periodization plans are increased volume at the start of the training season followed by increased intensity as the volume decreases.
Preparation Phase:
This phase generally marks the start of your training year and is included only if there has been a long transition following the end of your previous Race Phase.
The purpose here is to prepare your body for the next phase of your training plan. Workouts are low intensity with an emphasis on aerobic endurance, especially in the form of cross-training.
The total volume of training is low when compared with most other training phases.
Speed skills can be developed through drills, usually done on an indoor training or a set of rollers.
Base Phase:
The Base phase is your time to establish your basic fitness abilities of endurance, force, and speed skills. Generally, this is also the longest phase of your season and should last around eight to twelve weeks.
The base phase is divided into three segments: Base 1, Base 2 and Base 3.
Base 1 marks the start of steady increases in volume to boost your aerobic endurance and increase your body’s resilience to handle larger training loads.
In Base 2, on-bike endurance work begins to replace cross-training as the training volume increases. As your road rides become longer, the companionship of a group helps to pass the time. Just make sure that you ride with a group that rides at YOUR required pace and does not turn every ride into a “race”.
The majority of your road rides should be on continuously rolling to hilly routes that place controlled stress on your neuromuscular system. The best routes at this time of the season keep your efforts below threshold and allow cadences of around 80rpm and higher while seated on a hill.
Muscular-endurance training is also introduced in Base 2, with the addition of Tempo workouts based on hear rate or power output.
Base 3 marks a phasing-in of higher intensity training with the introduction of some proper hill work done at or slightly above threshold. Base 3 also brings about your highest total weekly volume of training with aerobic rides accounting for more than half of your training time. By the way, your longest training rides should now be as long as your longest race of the season, or two hours… whichever is the longer…
Group rides are still the best way to get the miles in but while it’s ok to occasionally put the hammer down in a sprint, just make sure you don’t turn these rides into “races”!!!
Your purpose now is to get as fast as you can with low-effort rides before turning up the heat in you Build phase.
By now, several weekly workouts should now have you riding at threshold, while your Speed-skills work is done mostly as “Form Sprints” on the road.
Build Phase:
Anaerobic-endurance is now introduced in your Build phase and just with force, hill work, and muscular-endurance training, this should be done with caution to avoid injury.
Feel free to race during this phase of your training, but remember that these are low priority races and you should regard them as a substitute for some of your anaerobic-endurance workouts. Anaerobic-endurance workouts may also include intervals and fast group rides.
During Build 1, endurance work is reduced but is still a prominent focus of your training. You would be better off by doing your long easy endurance rides at this stage with one or two team mates or training partners rather than a large group. Use the group rides for the development of muscular-endurance and anaerobic-endurance.
In Build 2 you again slightly decrease the volume of your training while increasing the intensity. Training in Build 2 emphasizes intensity to a greater extent than in the previous four weeks. Anaerobic-endurance and muscular-endurance sessions become longer while recovery is decreased between your efforts.
Peak Phase:
Now is the time you consolidate your racing fitness. It’s time to reduce your volume and keep intensity levels high relative to your expected demands of your targeted races while emphasizing recovery between workouts. Ideally you would want to train at race-pace intensity every 72-96hrs.
These workouts may also include “B” or “C” priority races that serve as a tune-up for the “A” races that follow.
The purpose of periodization is to reach peak form just as the important races occur.
Race Phase:
Whoop, Whoop… this is the FUN TIME!!!! Now all that is needed is to race, work on your strengths and recover…
In weeks where there are no races, a race-effort group ride is the best option.
Until now you have been working on your “limiting factors”, now it’s time to improve your strengths, so make them as strong as possible!!!
Transition Phase:
Your transition phase is a time for rest and recovery following your race phase. This should always be included after your last race for the season, but may also be inserted early on in your season following your first Peak phase to help prevent burnout later in the year.
Early season Transition phases may be brief periods of perhaps five to seven days, while at the end of your season such a break may be four weeks or so.
Use this time to “recharge your batteries” for your training and racing to come….
Remember, “If you can’t measure it, you can’t manage it!”

 RSS Feed